QR Code sharing
With version 7.1 or later, Sparkbooth can display a QR code for guests to access uploaded photos. An internet connection is required for this feature as the photos need to be uploaded before the QR code can be displayed. Here’s how to set it up:

- Open Sparkbooth and navigate to the settings menu.
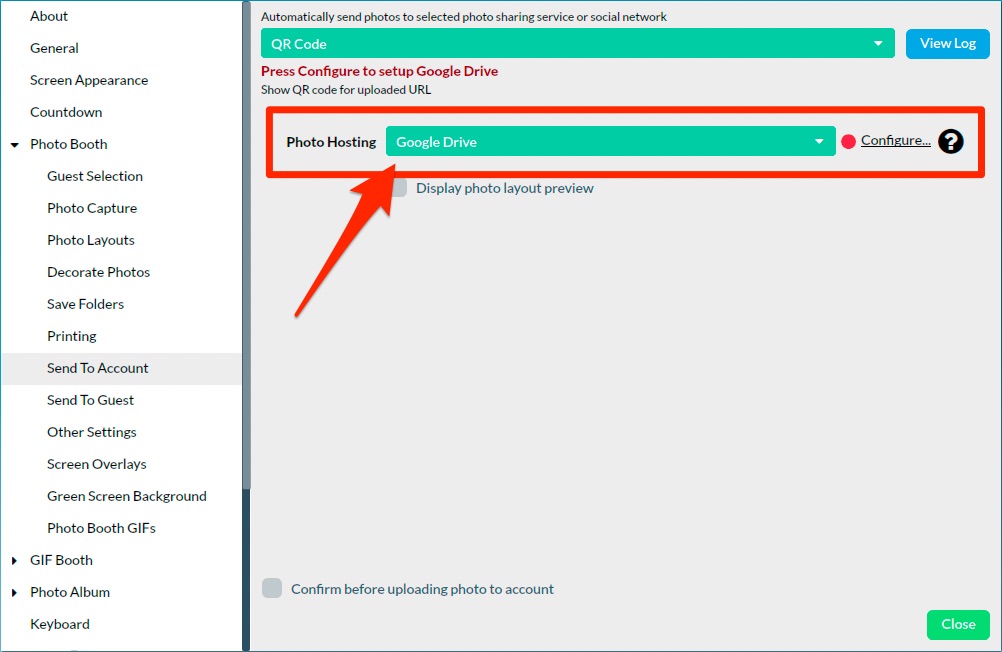
- Under "Send to Account," select QR Codes.
- Select your desired photo hosting service from the dropdown menu (e.g., Google Drive, Dropbox, etc.).
- Click the "Configure" link and set up the specific settings for the chosen hosting service.
Once QR Code sharing is enabled and the photo hosting is configured, Sparkbooth will automatically upload each photo to the selected hosting service. After the photo is uploaded, Sparkbooth generates a QR code that links directly to the uploaded photo's URL. Guests can scan this QR code with their mobile device to view or download their photo immediately.
Photo Album QR Code Sharing

- Open settings and navigate to "Photo Album," then "Image Options" or "GIF Options" in the left sidebar.
- Enable the checkbox labeled "Show QR."
- Choose a photo hosting option from the "Photo Hosting" dropdown menu.
- Configure the photo hosting by clicking on the "Configure…" button.
- Click "Close" to save the settings.
QR Code Photos Service Setup
- Sign up and subscribe for the QR Code Photo service
- On the account page, click "Add Event" button and fill in the event name and date. Photos will automatically organized by event
-
- Copy the API Key by clicking on the API box
-
- Open Sparkbooth, navigate to "Send to Account" settings and choose "QR Code" and then "QR Code Photos" for photo hosting
-
- Click "Configure", then past the copied API key into the API key field and click the "Login" button to sign in
-
- Select the event which you want to generate QR codes and upload photosxx
-
- Optional: In the layout editor, you can add the QR code to the photo layout. This will place a unique QR code on each rendered layout allowing guests to access their digital copy after it has been uploaded
-


Dropbox Sharing Setup

- In the Dropbox settings, enable the "Public share link" setting. This will generate a publicly accessible link to the uploaded photo.
Google Drive Sharing Setup
For Google Drive photo sharing, modify the folder access where photos are uploaded.
Steps for Sharing on Google Drive
- Access Google Drive: Go to the Google Drive website.
- Create a Share Folder: If you do not already have a share folder for the photos, create one.
- Select Your Folder: Select the folder you wish to share.
- Open Sharing Settings:
- Web: Right-click the folder and select "Share" or click the "Share" icon at the top right.
- Mobile: Tap the three dots by the folder and choose "Share."
- Adjust General Access:
-
On the web, find "General access" and select "Change to anyone with the link" if it’s set to "Private to you."

- Change viewer permissions as needed by using the dropdown menu.
-
- Set Permissions:
- Under "General access," choose "Anyone with the link" and set the access level: Viewer, Commenter, or Editor.
- Confirm Changes:
- Click "Done" to save the new permissions.
- Open Sparkbooth and select Google Drive for QR Code Photo Hosting
-
- Click Configure to grant Sparkbooth Google Drive Permission
- Select the photo share folder when granting Sparkbooth permission, the folder picker will be displayed. Double-click to go into a folder. Single-click and wait a second to select a folder.
-
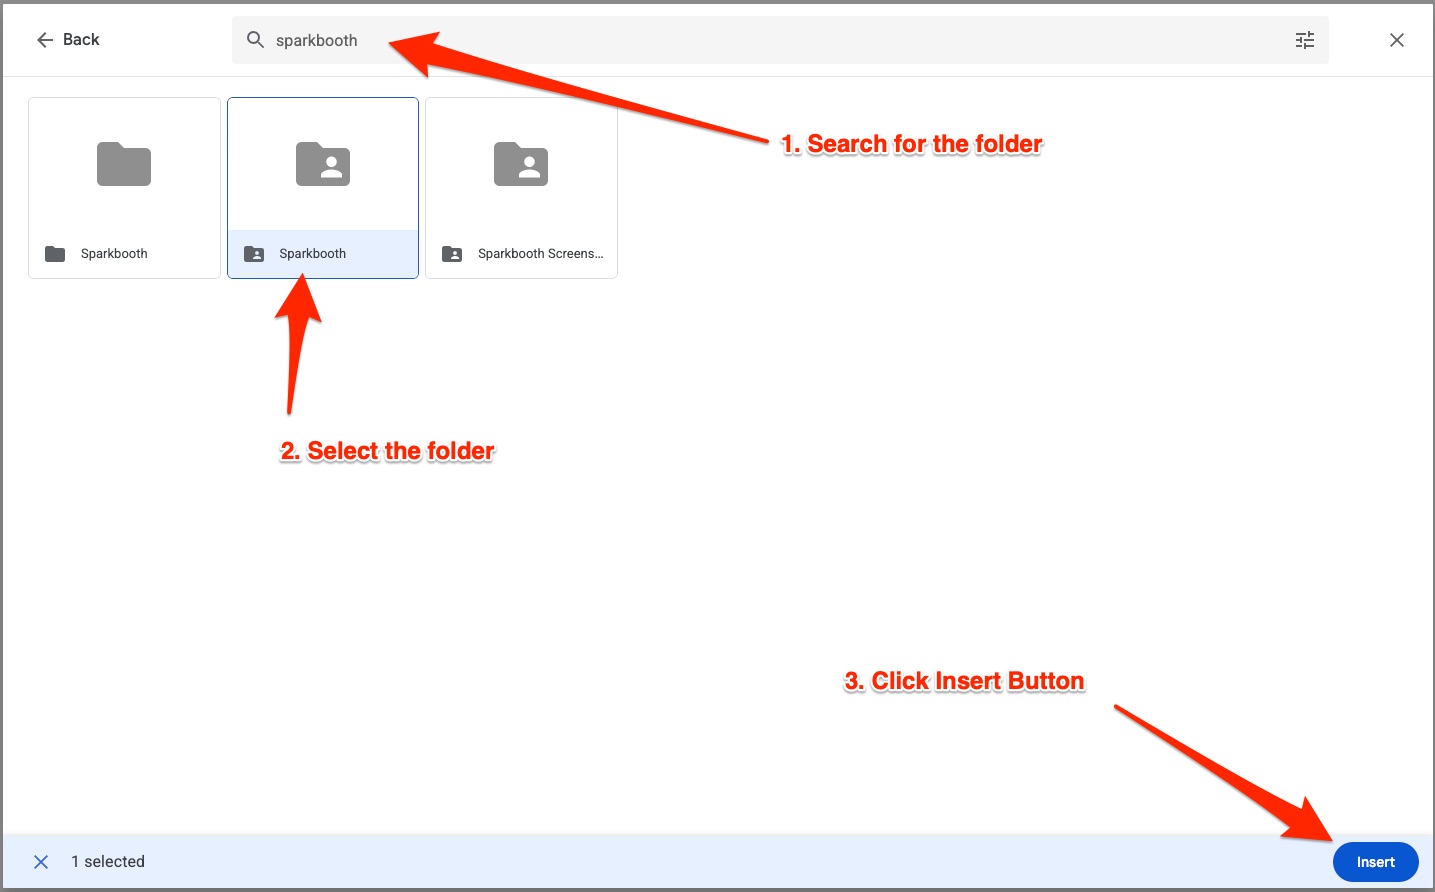
Google Drive Folder Picker
-
How to select folder or subfolders without search
-